I absolutely love my Cricut machine! I use it daily and have come up with my 5 best Cricut tips, tricks and hacks to share with you to get the best out of your Cricut cutting machine when cutting your SVG cut files. Watch this space for my 5 best tips when using your Brother ScanNCut and your Silhouette Cameo too!
My 5 Best Cricut Tips
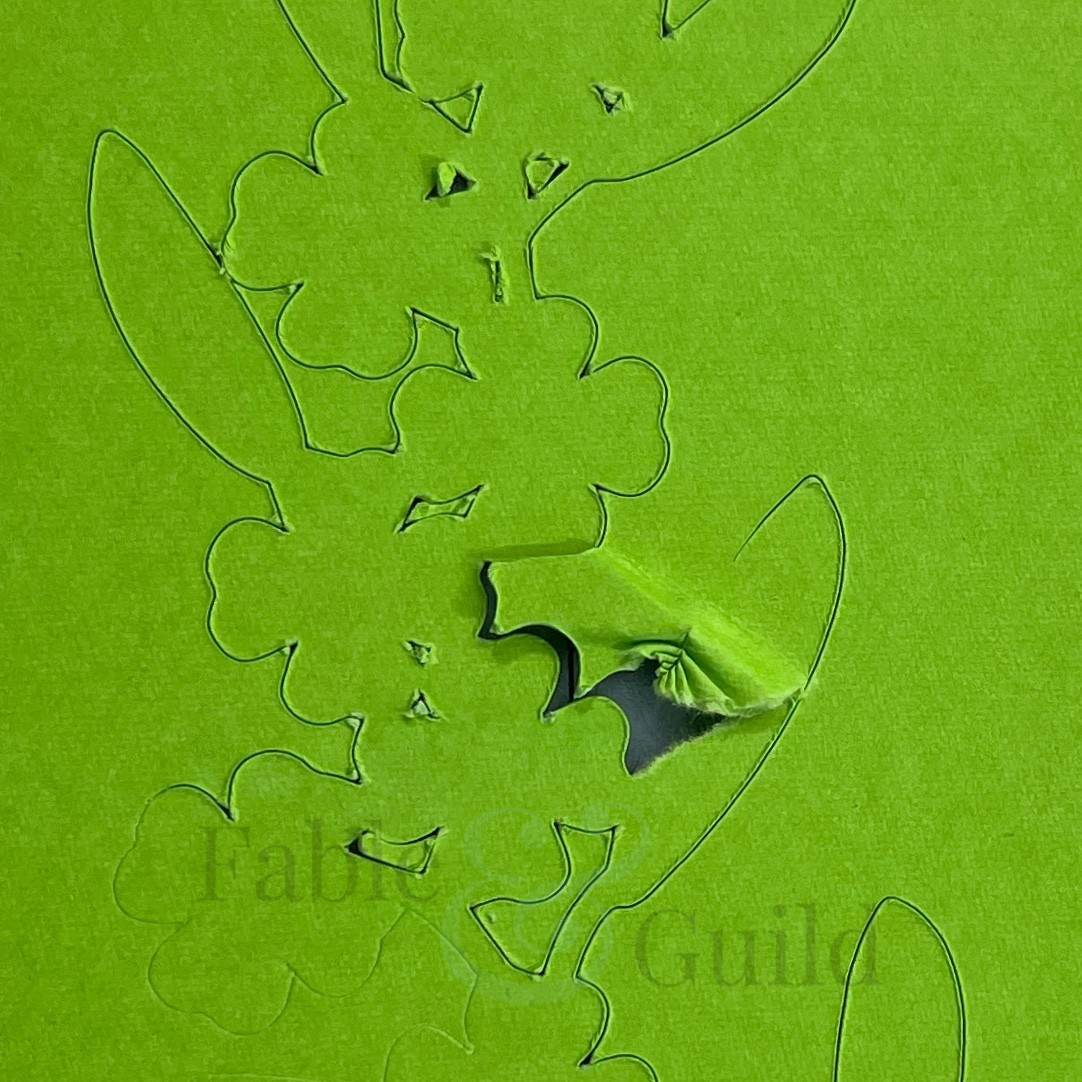
1. Problems with your Cricut project materials ripping and dragging?
I often hear and see many issues with paper, cardstock or vinyl ripping or dragging when cutting an SVG cut file with your Cricut cutting machine. This can be really frustrating, not only in time and materials, but also when something cuts badly it dampens the excitement of cutting your SVG cut file project!
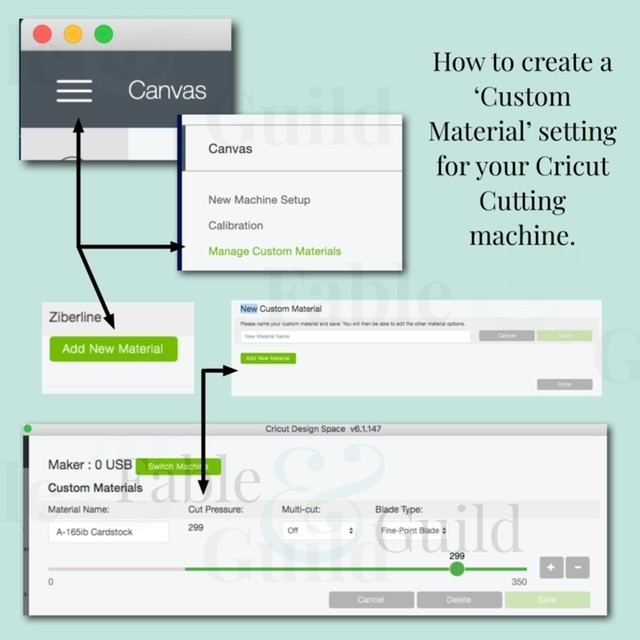
Have you tried exploring the ‘Manage Custom Materials’ tab in Cricut Design Space to set up and save some setting as personal favorites? This setting is not to be confused with the Cricut ‘Pressure’ setting (More, Default or Less) when setting the ‘Base Material To’.
The Cricut Custom Settings can be accessed from the Cricut Design Space menu bar and it will be a game changer for you! The best 30 minutes you can ever spend will be exploring the ‘manage custom materials‘ tab in Cricut Design Space and set up a few personal Go To’s to use with your favorite materials. Here are a couple of my favourite custom material settings that I use on my Cricut machine:
- For 165Ib Cardstock I use 299 cut pressure (works every time for me!).
- For Book Cover Vinyl I use 87 cut pressure (great for very fine gauge vinyls).
- For 80gms Paper I use ‘Light Patterned Paper’ and set the pressure to ‘Less’ (great for copy weight paper).
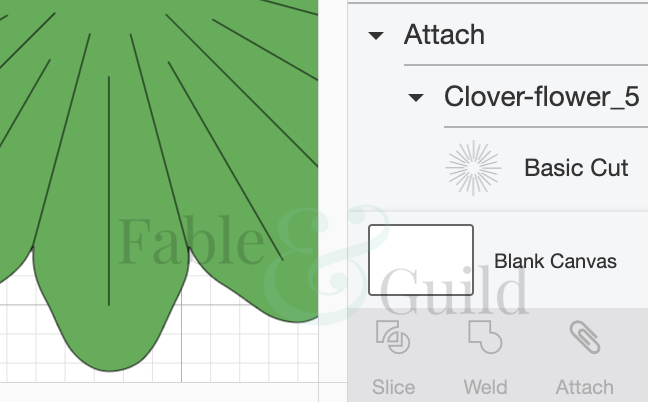
2. What is the Cricut ‘attach’ for?
I use the ‘attach’ feature a lot! When I am designing my SVG cut file art work I like to think about how I can improve the SVG cut file outcome both in terms of an easy cutting experience, but also to add texture and interest to the final outcome.
If you are uploading a cut file into Cricut Design Space and it has an additional layer that contains score, fold, draw or cut lines etc. then you will need to select both layers and select ‘attach’. This ensures your Cricut will recognise that these files are to be cut together. Cricut may require an additional tool to undertake the required action. This can be set in the ‘Operation’ menu.

3. What is my favorite must have tool when making my SVG cut file projects?
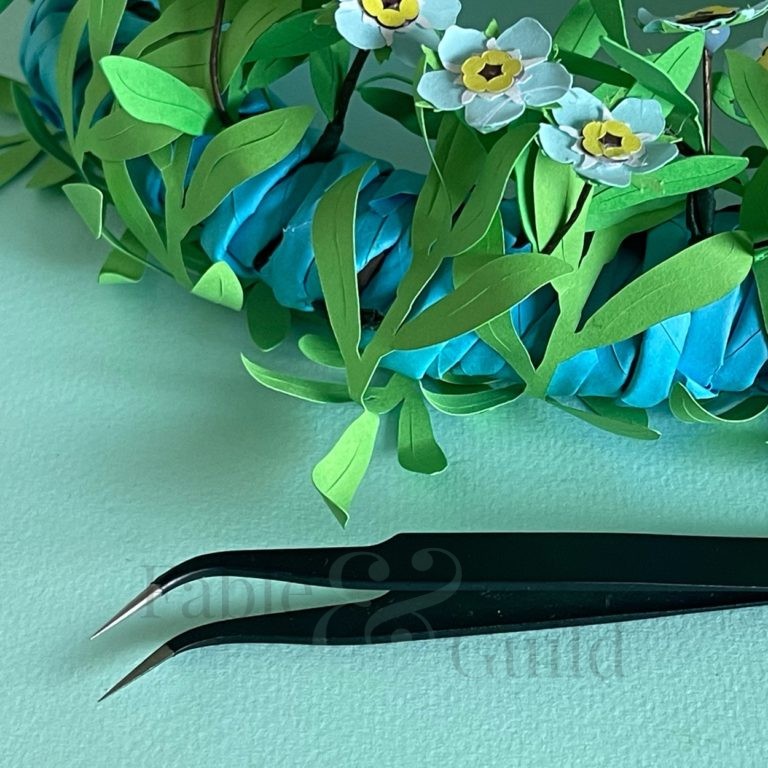
If I was asked “What was the one tool that I absolutely could not live without when cutting my SVG cutting file projects?” then this would be it! A pair of fine point (very fine point) long nose angled tweezers. These tweezers get under the smallest of my SVG cut file designs and lift all the little pieces gently away from the sticky Cricut cutting mat each and every time!
Fine point tweezers are also really handy when weeding vinyl and when used along side My Weeding Wand Tool makes the task so much easier! This is a vinyl weeding waste collector that you use to assist you when weeding your adhesive vinyl decal and HTV (Heat Transfer Vinyl) decorative projects.
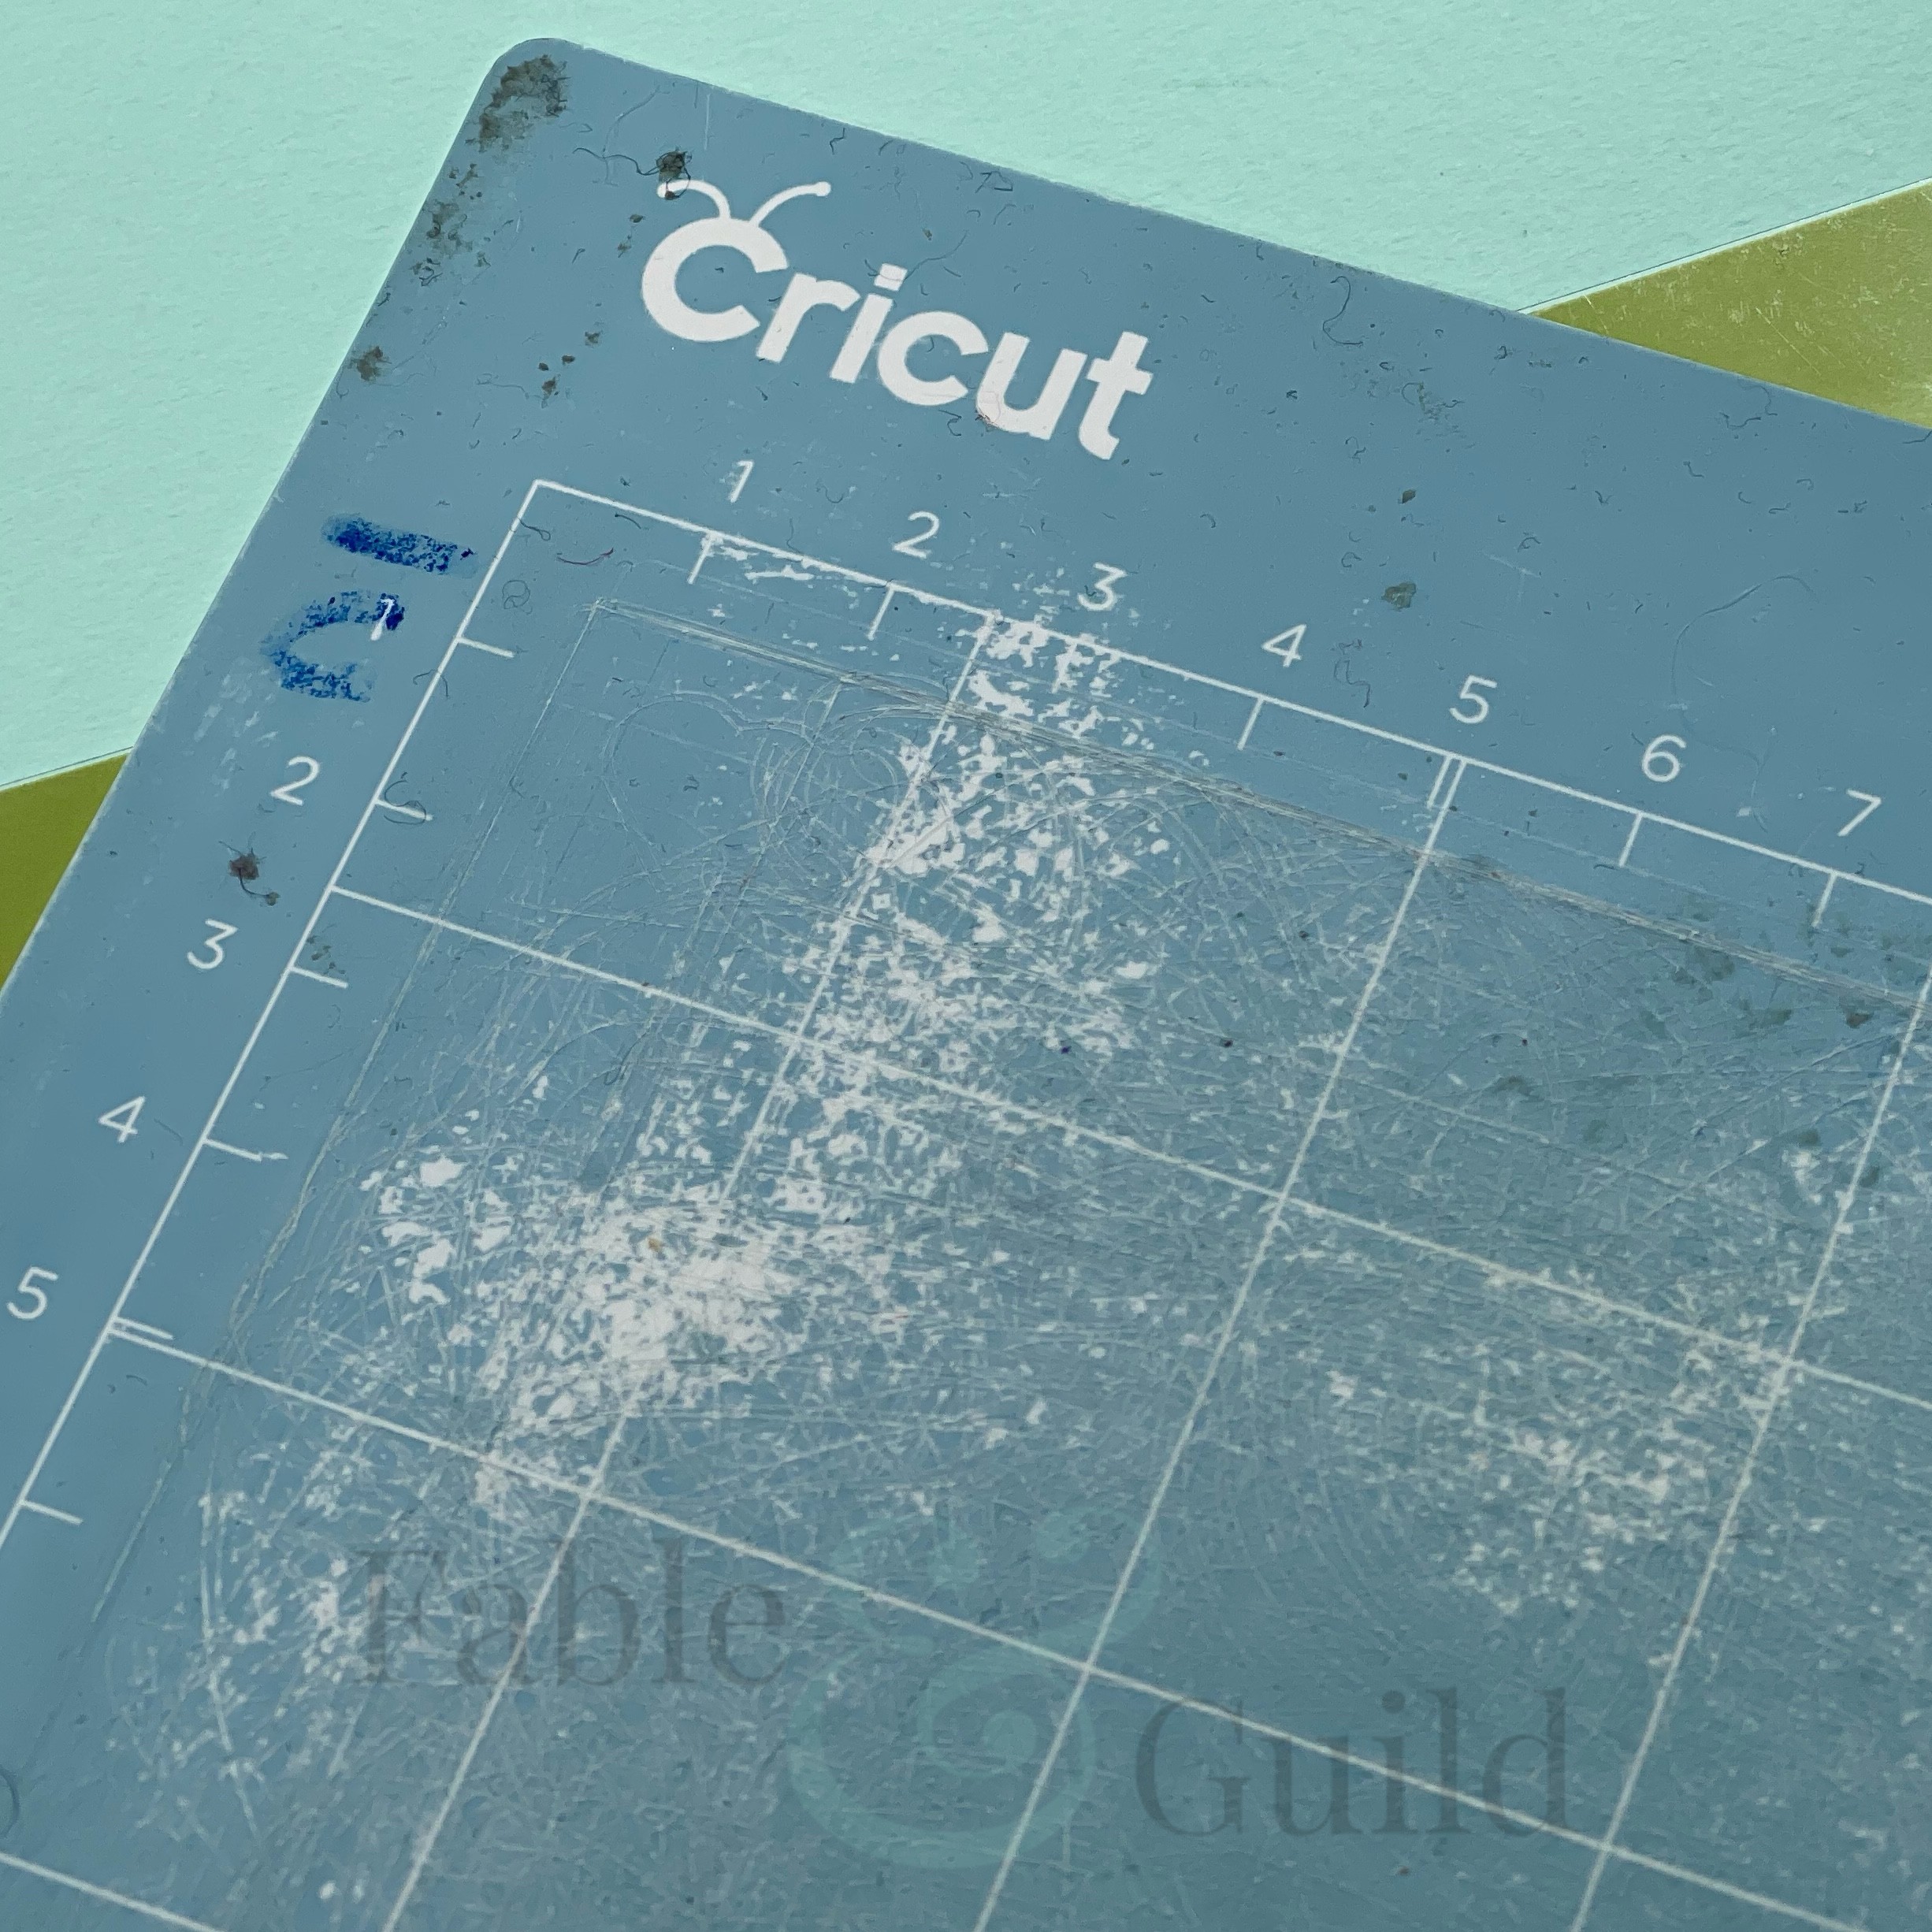
4. How to make your Cricut cutting mats last… And last!
I keep my newest mats for fine cut SVG projects. I then have a secondary mat for everything else. Once I purchase a new Cricut cutting mat then this goes to the top of my pile and is used for my fine cut art projects. I also have a very loose rota of washing with a water based dish washing liquid soap and baby wipes as my ongoing line of defence.
Once all my stick has gone on the Cricut cutting mat, then I use a spray adhesive or low tack spray (very lightly) to reinvigorate my Cricut cutting mats over and over again. I have ended up with four or five Cricut cutting mats on the go and I now keep the less sticky mats for paper and fabric before I jump straight to the spray adhesive. This means the material comes away much easier from the Cricut cutting mat.
If your Cricut cutting mat is absolutely at the end of it’s sticky life then you can also tape your material down on to your cutting mat with painters tape.
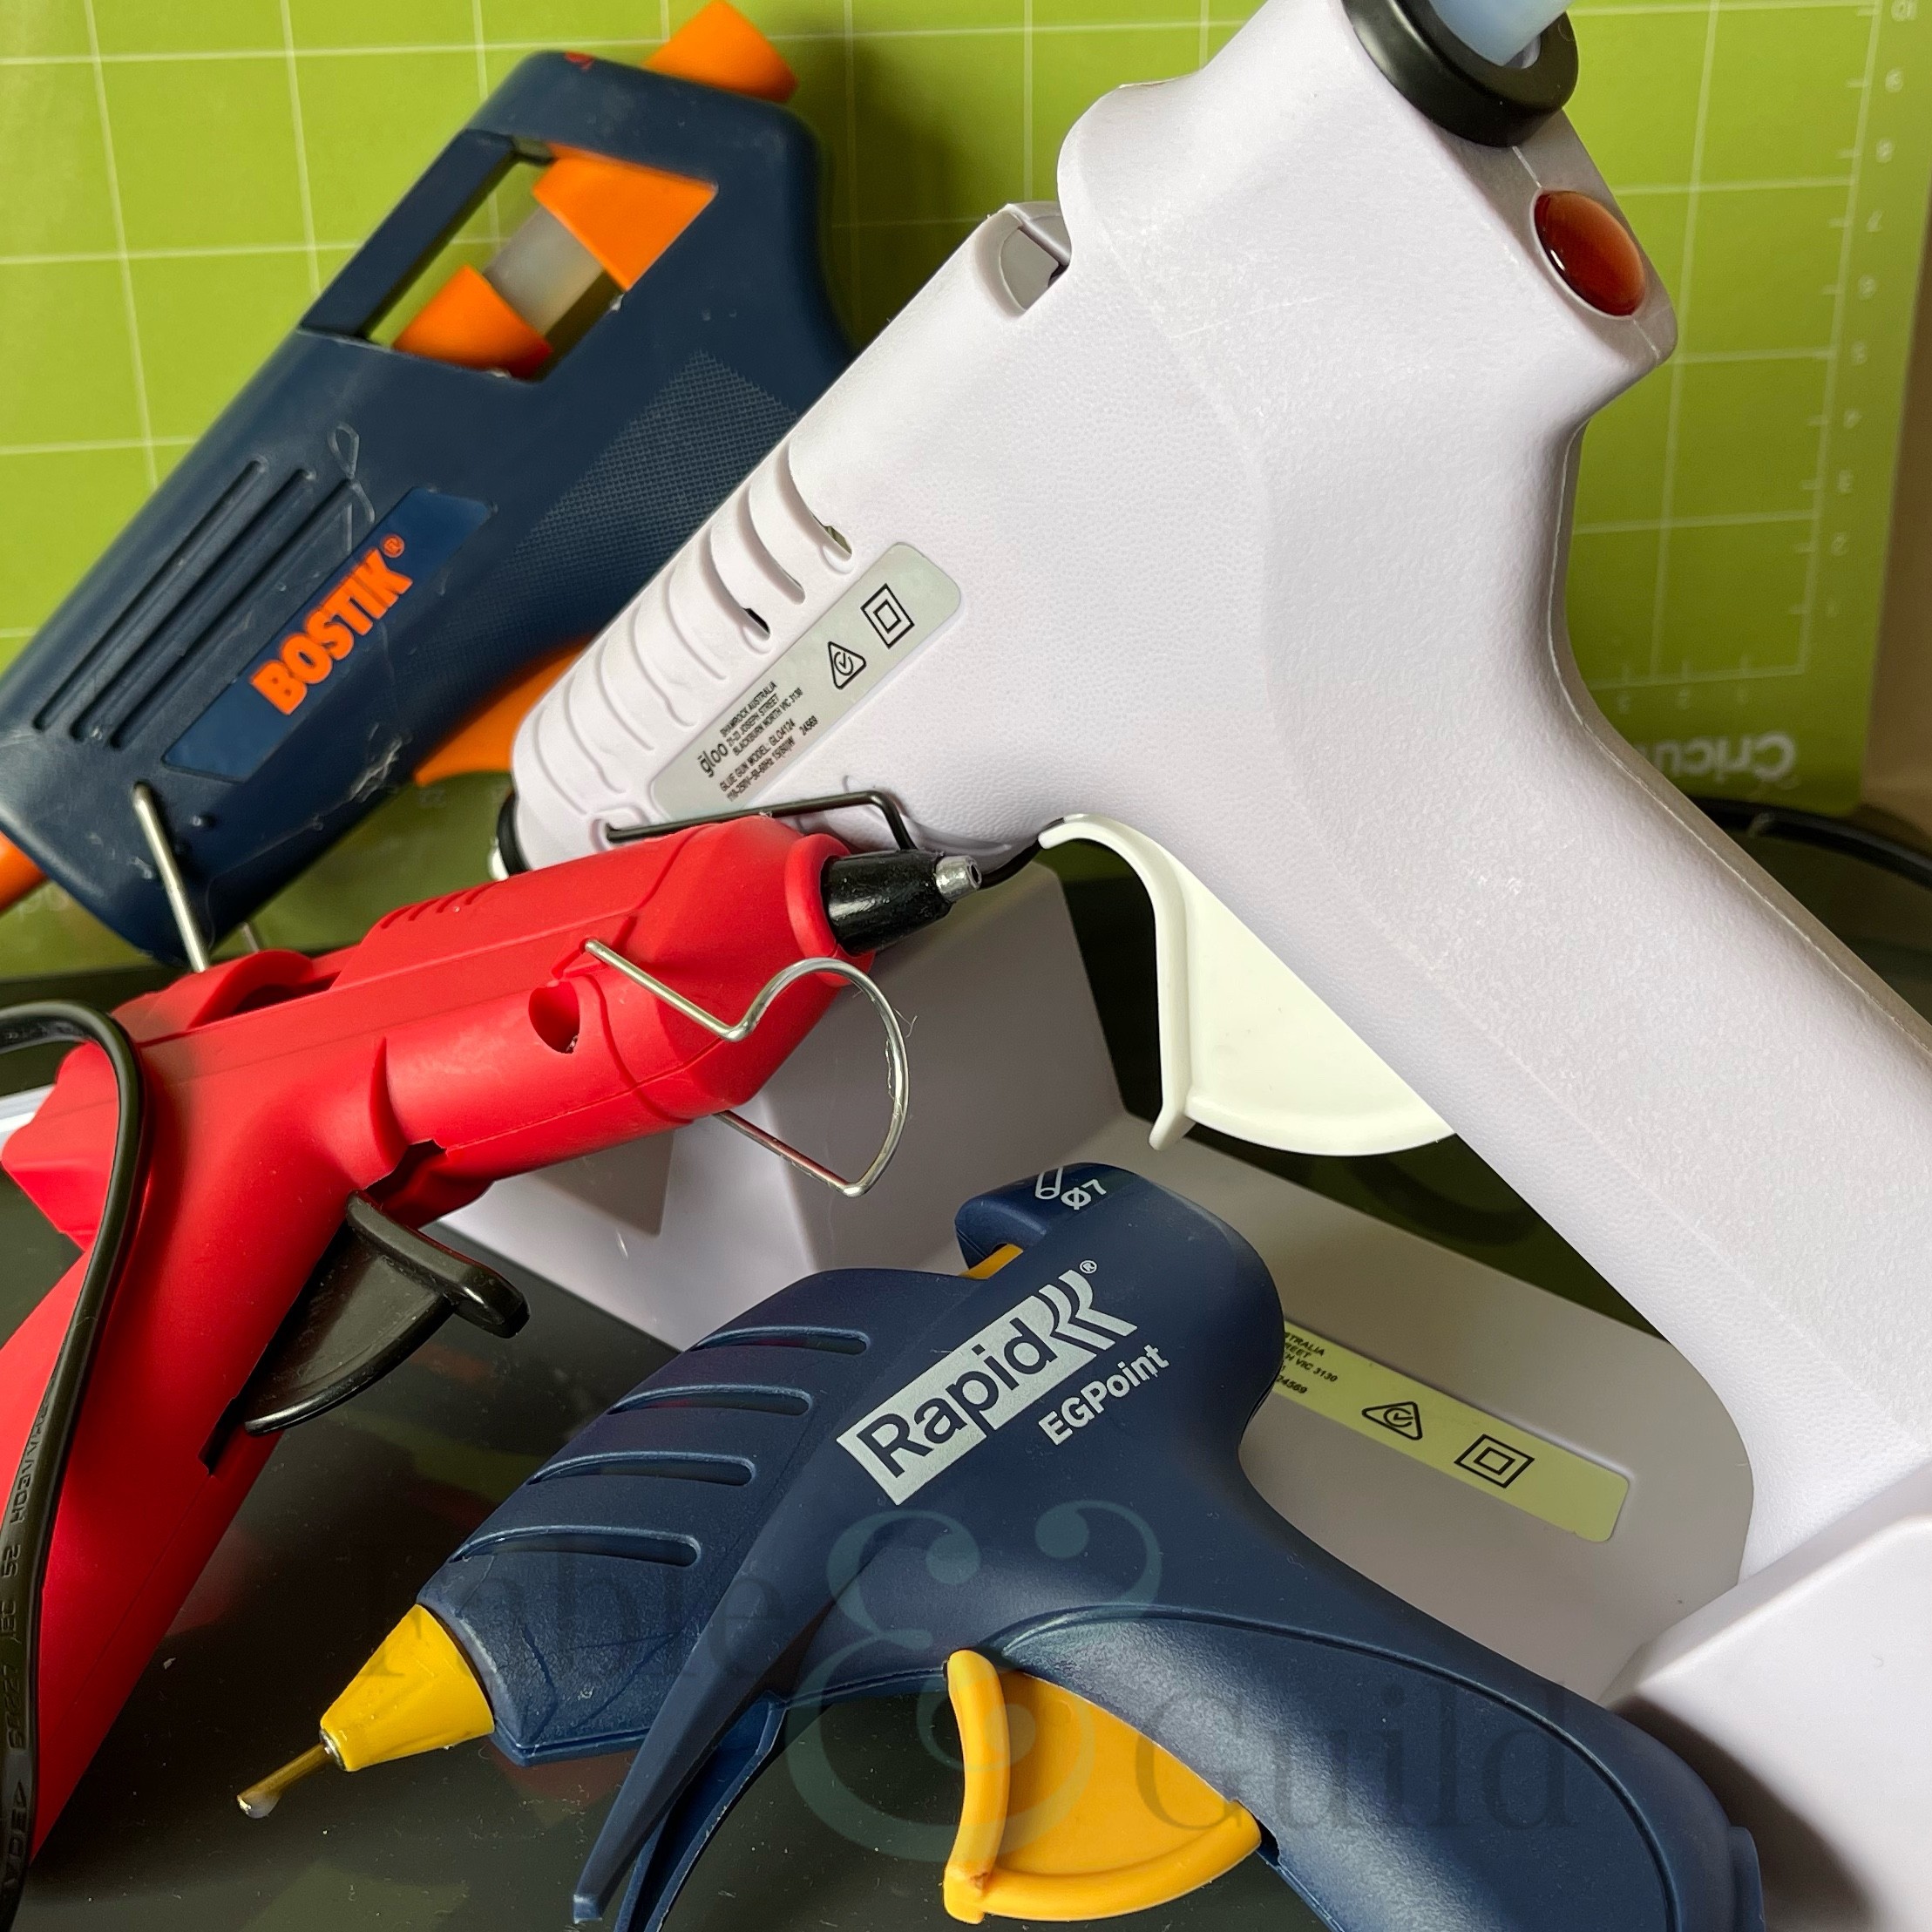
5. What is the best glue to use?
I like to have different options for different requirements!
Firstly, I like to use a quality dry glue (glue stick) when I am working on my 3D multi layered SVG cut file projects. This type of glue tends not to wrinkle your paper or card stock and is quite friendly when it comes to repositioning.
Secondly, I also find a liquid glue with a fine point applicator is an invaluable asset for gluing very small details.
Thirdly, a glue gun, of which I have several and none of them sadly really seem to hit the mark! However in order of usefulness, my best Cricut tips gluing tip is to get a glue gun one with a fine point (a metal nozzle is better). We have found that a rechargeable glue gun (if you can find one) is also very useful as you are not constrained by the wire. I use a hot glue gun rather than a low temperature glue gun, although this is more a safety issue and who else in your home will use your glue gun?
Check us out on Facebook
- Please give us a Like and Follow us on Facebook
- Join our Cricut ScanNCut Silhouette SVG Help & Show Off Facebook Group created to ask questions & show off all your SVG art work created by you and your Cricut, ScanNCut & Silhouette cutting machines – let’s get creative and let’s celebrate getting creative!
- Like what you see, then please Share our My 5 best Cricut tips, tricks and hacks (everyone should know) post on Facebook.
If you enjoyed our 5 Best Cricut Tips, then take a look at our 3D SVG Cut file art to inspire you…
Please see our new 3D SVG cut file designs ready to be Made by You!
-

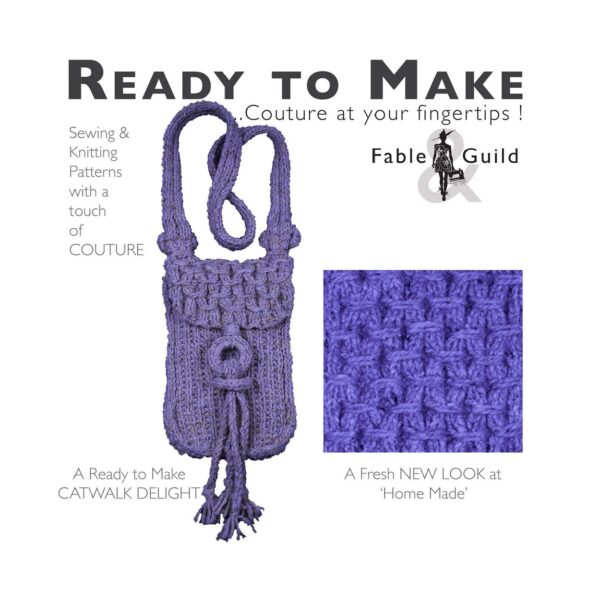
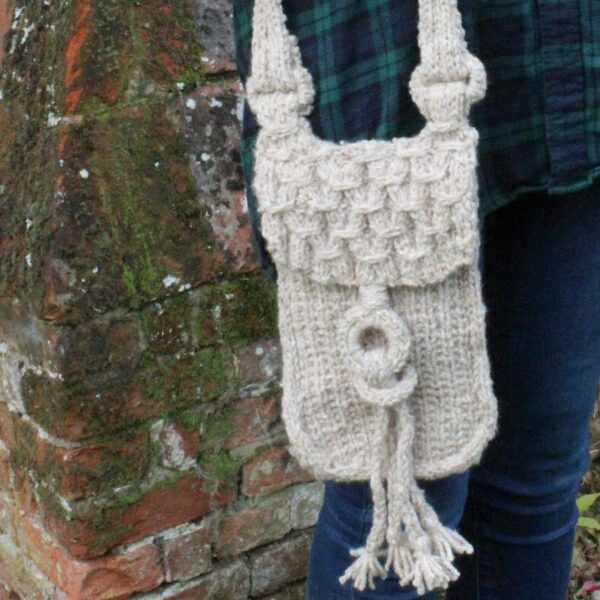
The Bugle Messenger (A PDF Knitting Pattern For Bag Purse Handbag)
US$8.35 Exc. Tax Add to cart -
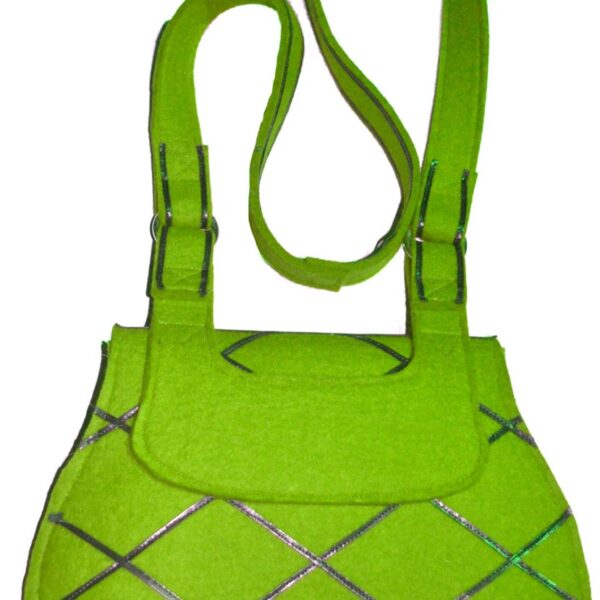
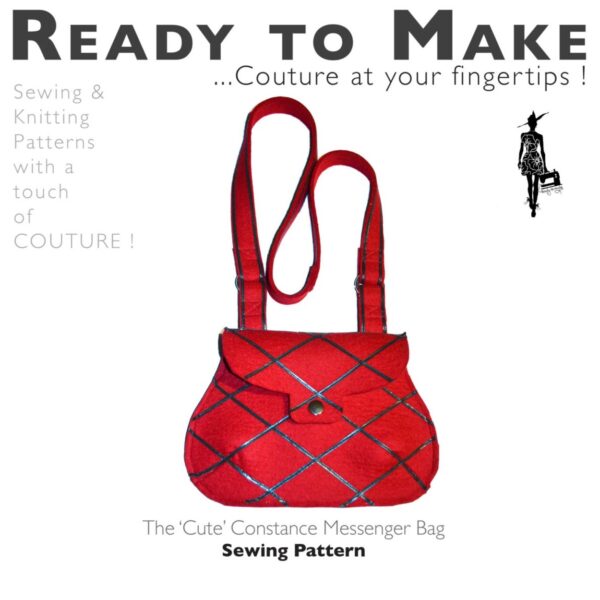
The Cute Constance – A PDF Pattern For A Messenger Bag
US$8.35 Exc. Tax Add to cart -
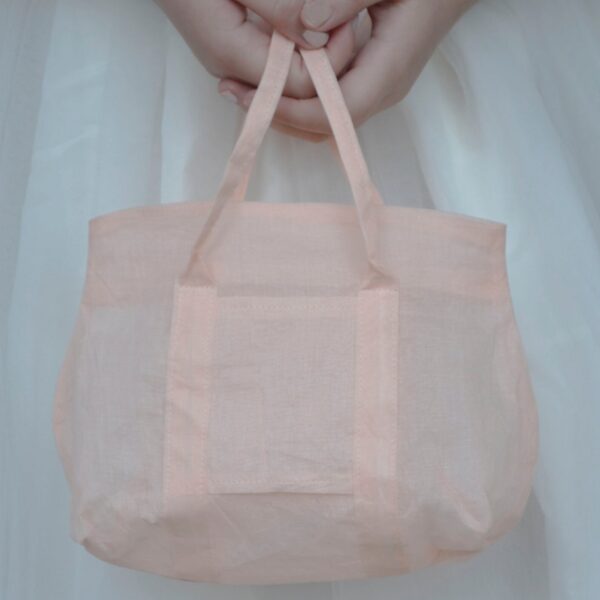
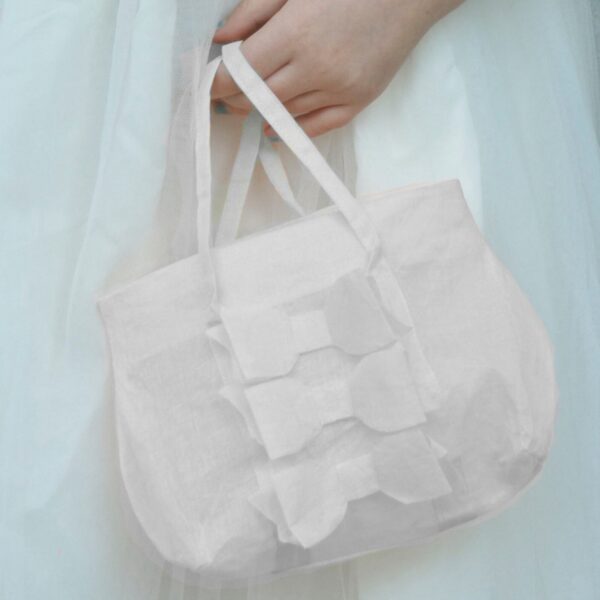
The Mini Lucy (PDF Tote Bag Sewing Patterns)
US$8.35 Exc. Tax Add to cart -
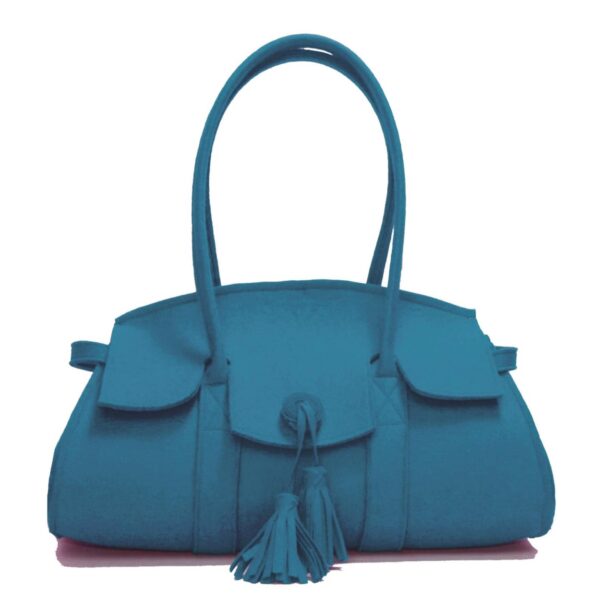
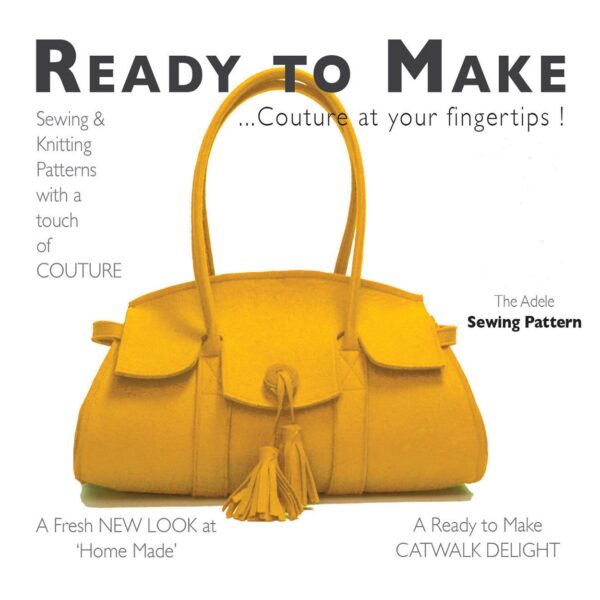
The Adele Baguette – A PDF Handbag Patterns To Sew
US$8.35 Exc. Tax Add to cart