“Here’s How to upload your SVG files to Cricut Design Space” is a Cricut SVG upload guide to act as a visual guidance reference. It outlines the steps required along with image references to guide you through the simple step by step process.
We are using our Marigold Muse SVG cut file (which is also our featured image for this post) from the Fable & Guild Decorative Arts Collection as the example upload file.
Cricut SVG Upload Guide
1
Unzip your SVG files from your download folder.
2

From your Cricut Design Space Window click – Open New Project.
3

Locate ‘Upload Image’ and click.
4
This should take you to the Cricut Design Space ‘Drag and Drop’/Browse Window.
5

Locate your SVG cut files from your desktop
Tip: you may find it useful to name and number each of your files when saving to the Cricut Art Board.
Tip: Each of our files are numbered – you will find the layer number at the end of the file name (No. 1 is the uppermost layer)
6
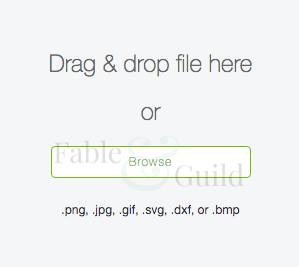
Upload your SVG cut files on to the Cricut Design Space ‘upload window’ – one file at a time.
7
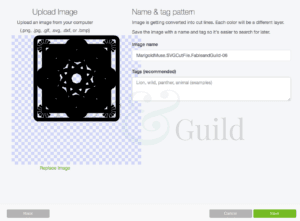
Upload each SVG Cut File and click ‘Save’
8
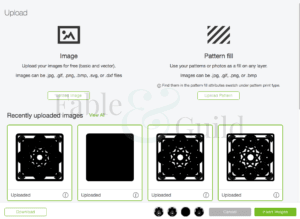
Once all your SVG files are uploaded, select all your files for your project and click ‘insert images’.
9
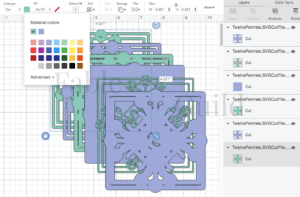
Your art board should now look like this.
10
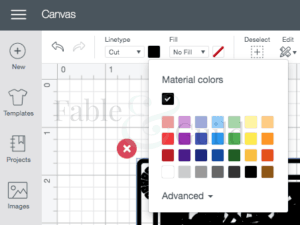
Select each file & color fill each layer to a similar color to the card layers you intend to use.
11
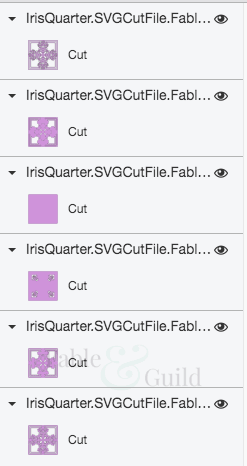
Your layers panel should look like this and you are now ready to cut your SVG files.
Click ‘Make it’.
Check us out on Facebook
– Please give us a Like and Follow us on Facebook
– Like what you see, then please Share our Cricut SVG Upload Guide on Facebook.
Further 3D SVG Cut file art to inspire you…
As you can see below, here are our latest 3D SVG cut file design projects.


